Turn Blog Posts Into YouTube Scripts and Faceless Videos in One Pass

Key Takeaways
- Automated pipelines turn a 3,000-word post into minutes of narration.
- The best video candidates already rank and use clear subheadings.
- Spoken scripts work best at 150 to 180 words per minute.
- Each subheading should map to one video beat.
- Put your strongest point first.
- List-heavy posts without an argument break down when spoken.
- Keep keywords, but loosen the wording around them.
Preparing Your Blog Post for Video Conversion
A post is not video-ready just because it ranks. Prep decides script quality, and among AI content repurposing tools, the best ones treat conversion as compression, not copy-paste.
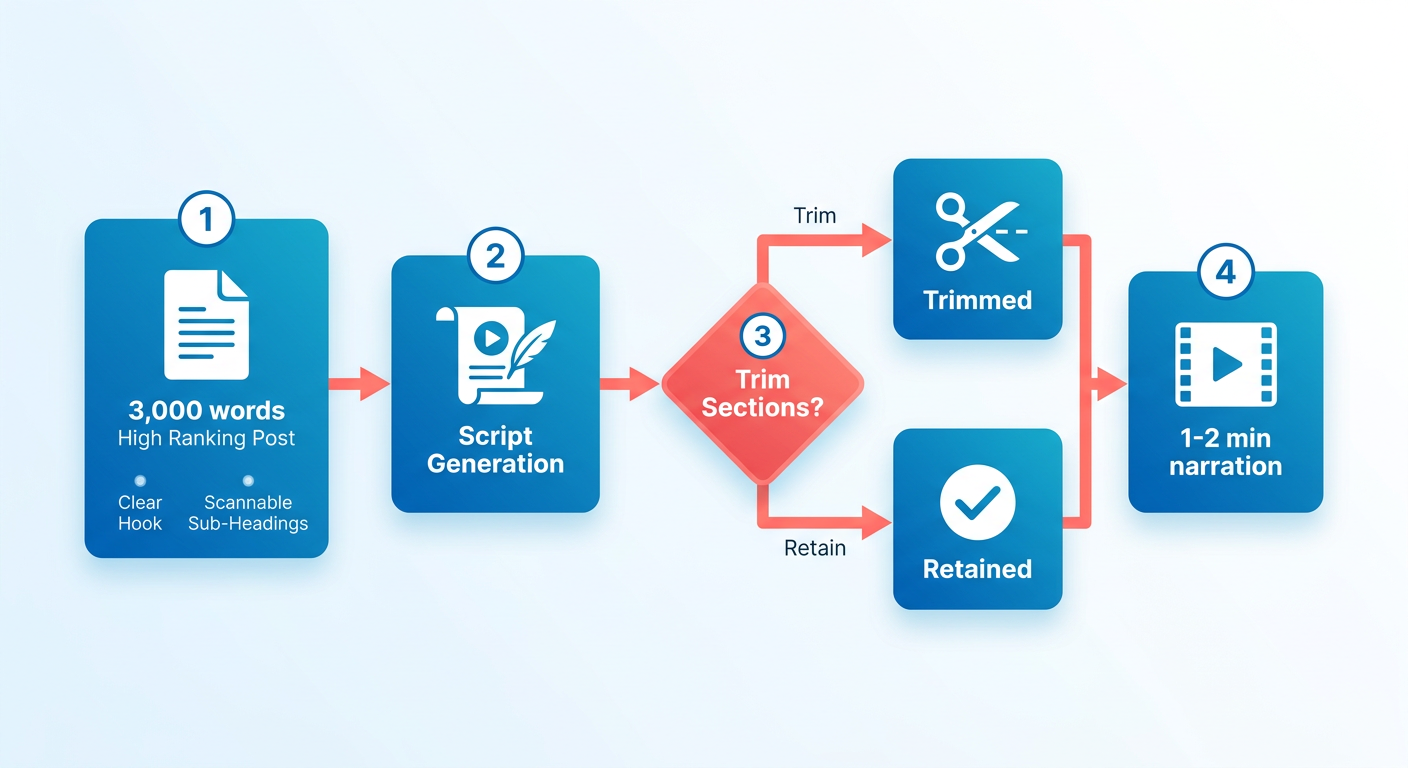
These pipelines routinely collapse 3,000 words into ninety seconds of narration. So the real question is not how long the video should be. It is which sections survive. That makes prep more important than any prompt you give the tool.
Which posts to convert first
Start with high-ranking posts that have a clear headline hook and scannable subheadings. Those posts already read like video beats. A post that ranks has proven search demand, and its structure gives your script a spine.
Map each subheading to one video beat. If a subheading does not earn screen time, it will not earn a line in the script. Put your strongest point first, because compression punishes anything buried near the bottom.
Skip pure list dumps with no through-line. They read fine on the page and fall apart when read aloud. Automation cannot rescue a piece with no argument.
Rewriting for the ear, not the eye
Trim filler and rewrite for how people actually listen. Aim for 150 to 180 words per minute, use contractions, and cut any sentence you would not say to a colleague at their desk.
Keep your SEO keywords, but relax the syntax around them. A phrase that works as an on-page anchor usually sounds stiff out loud. Rewrite the sentence so the keyword lands naturally in speech. Your title and description handle the strict-match SEO load. Research from PresentAgent indicates that scripts pre-optimized for speech tend to earn about 35% higher watch-time than raw article text read aloud.
Then swap in CTAs that work in audio. "Subscribe below" or "grab the full checklist in the description" translate cleanly. On-page lines like "click the button to your right" do not.
Locking brand voice before you generate
You can, and you should. Running every article through a Persona Engine first means the tone matches your brand voice before a single line of narration gets generated.
This is the step most teams skip, and it shows. A synthetic voice reading off-brand copy sounds like a stranger presenting your content. Set the persona upfront and the voice stays consistent whether you publish one video or forty.
Think of prep as front-loading human intent. You set type, length, tone, and purpose as parameters. The modular stages run in one pass, and you get a script that already sounds like you. Once the video exists, AnyPost can turn that same content into social carousels and push it across LinkedIn, X, Instagram, TikTok, and YouTube, so distribution runs on its own too.
Converting the Blog Post into a YouTube Script with AI
A prepared post becomes a working script in about two minutes with the right prompt. The output usually needs under 10% manual editing before it is teleprompter-ready. Script generation is where automation earns its keep, mostly because prep already did the hard work.
Your prompt controls tone and structure, but the script length depends on the source depth. Force a short, surface-level post into a long script and the AI pads it with fluff. Let the natural density of the original decide the runtime instead. Viewers can smell padding.
The prompt that turns a post into a script
Start specific and constrained. The clearer the format request, the less you edit later.
Paste your prepared post and use this production-ready system prompt:
SYSTEM PROMPT: Blog-to-Video Script Generator
Role: You are a senior video scriptwriter specializing in converting long-form written content into high-retention YouTube scripts for faceless channels.
Input: You will receive a blog post. Your task is to transform it into a complete, production-ready YouTube script.
Output Format — Strictly Follow This Structure:
1. HOOK (0:00–0:10) — A single, powerful sentence that states the video's core promise or most surprising finding. Must create an immediate information gap. No filler, no "welcome back."
2. INTRO (0:10–0:25) — 2–3 sentences establishing the video's value proposition. Answer: "What will the viewer know or be able to do by the end of this video?"
3. BODY SECTIONS — One section per major sub-heading of the source post. For each section, provide:
- Section Heading: A spoken transition line (e.g., "Here's where most people get this wrong.")
- Narration: 2–4 sentences of spoken script. Use conversational language, contractions, and short sentences. Explain the concept, then give one concrete example or data point from the source.
- Visual Cue: A bracketed note suggesting on-screen visuals (e.g.,
[Visual: split-screen comparison graphic]).4. CTA & OUTRO (Final 15 seconds) — A clear, spoken call-to-action that directs viewers to the next step (subscribe, comment, or visit the link in the description).
Style Constraints:
- Tone: Authoritative but conversational. Write as if explaining to a smart colleague.
- Pacing: Target 150–160 words per minute. Use varied sentence length to maintain rhythm.
- Vocabulary: Replace written words with spoken equivalents. "Utilize" becomes "use." "Additionally" becomes "also" or "plus."
- No On-Page Language: Never use phrases like "as mentioned above" or "in this article."
- Speaker Cues: Add parenthetical notes for the voice actor where emphasis or a pause is needed (e.g.,
(pause)or(emphasize this point)).Quality Bar: The script must be factually faithful to the source. Do not invent statistics, quotes, or mechanisms. If the source lacks a specific detail, omit it rather than fabricate it.
The hook carries the most weight. Faceless formats live or die on the first ten seconds, because no personality carries the viewer through a slow open. Prioritize information over face time, and retention follows.
Refine in passes. Ask for "more rhetorical questions," "tighter sentences," or "cut the intro to 8 seconds." Each pass costs seconds, not hours.
Formatting for a teleprompter
Format so a synthetic voice reads it cleanly and an editor can build visuals fast. Three elements do the job: timestamps, speaker cues, and visual cue notes.
- Timestamps: mark section breaks (0:00 Hook, 0:15 Intro) so pacing stays honest.
- Speaker cues: signal tone shifts for the voice model (pause, emphasis, slow down).
- Visual cue notes: bracketed notes like [b-roll: dashboard] tell the video step what to show.
Ask your prompt to bake these cues into the output so you skip the reformatting round trip. One clear format request, and the script arrives with timestamps, speaker cues, and visual notes already in place.
Does the script pass QA?
Run three checks before you approve it: readability, keyword density, and length. A tech explainer that should convert cleanly ought to hit around 92% readability in a two-minute script without hand-editing.
Readability: aim for spoken-word clarity. Short sentences, no clause pileups. Keyword density: keep the target phrase natural, not stuffed. Narration that sounds keyword-stuffed tanks retention. Length: verify the final word count matches your target duration. Matching the pacing keeps the voice model from sounding rushed or unnaturally slow.
| Step | Tool(s) | Avg. Time | Skill Level | Cost/Video | Expected CTR |
|---|---|---|---|---|---|
| Prep post | Manual + prompt | 10 min | Beginner | $0 | n/a |
| Generate script | AI prompt | 2 min | Beginner | Low | n/a |
| Refine tone | AI prompt loop | 5 min | Beginner | Low | n/a |
| Format cues | AI prompt | 1 min | Beginner | $0 | Medium |
| QA check | Manual review | 5 min | Intermediate | $0 | High |
Total end-to-end: 30 to 45 minutes for a standard post that yields a concise script.
The economic case for faceless content depends on this format. High-volume information channels run on short, dense, informative videos, and that is what automated conversion produces most reliably. Compression is not a limitation. It is the format that drives performance. Streamline this step and you set up an efficient production loop.
Creating a Faceless Video with AI Avatar & Voiceover
A faceless video needs three things: a voice, a face stand-in, and visuals that match the script beats. Automated pipelines handle all three from the script you already generated. This is where a text asset becomes a publishable video without a camera, a studio, or a team.
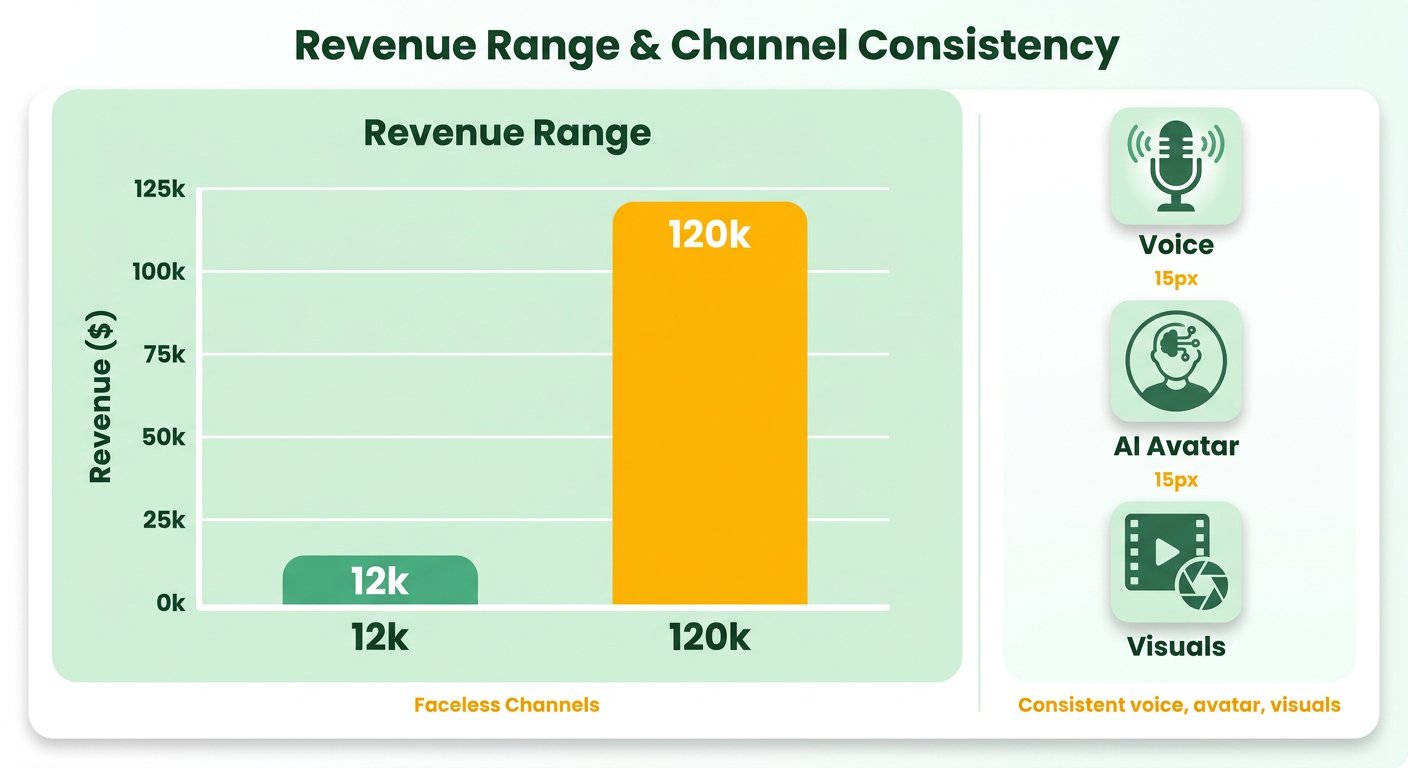
The economics here are proven at scale. The channel Mr. Nightmare, which uses narration over stock visuals rather than showing a host, reportedly earns in the range of $35,000 to $40,000 per month from roughly 50 million monthly views. The formats that monetize best prioritize information over personality. That lines up with the dense, structured output automated conversion gives you. Your voice and avatar do not need to be charismatic here. They need to be consistent.
Which avatar style fits your brand
Pick the avatar that matches how your audience already reads you. Realistic avatars suit B2B and SaaS explainers, where authority signals trust. Cartoon or stylized avatars fit playful consumer brands. The wrong choice reads as a mismatch before the first sentence lands.
Most avatar creators let you build a reusable presenter in about ten minutes. Save it once, reuse it across every video. Brand consistency comes from repetition, not a new face each week.
Do not overthink realism. Faceless formats work precisely because individual personality is not the draw. A clean, consistent presenter builds more brand equity than a hyper-realistic model that changes style video to video.
Cloning a voice and syncing it
A branded voice takes about five minutes of sample audio to set up. You supply a clean voice sample, the tool builds a clone, and every future script runs through that same voice. That keeps a channel sounding like one brand instead of a rotating cast.
The sync step maps your script sentences to the avatar's lip movement automatically. Upload the script, assign the cloned voice, and the pipeline aligns audio to visuals. A full render usually finishes in about fifteen minutes.
Watch your pacing here. The narration should flow without dragging or rushing. If a sentence runs too long, split it in the script editor before rendering. The avatar reads the text exactly as written, so any structural tightening has to happen upstream in the script, not in the voice generator settings.
Where AnyPost.ai removes the manual steps
The video creator auto-populates with your generated script and pulls your pre-saved avatar for you. With AnyPost's avatar cloning and generation, you can clone an existing avatar or build a new one for branded content, then reuse it across videos. The script-to-render handoff runs inside the same pipeline that picked the blog post.
For final polish, import the rendered clip into a free editor and organize the timeline by script section. Add royalty-free B-roll that reinforces each beat. Product screenshots work well over feature explanations; stock clips work for context.
Run auto-captions, then tweak them by hand for SEO-rich subtitles. Captions get indexed, so this is a good place to grab extra search reach with keyword-relevant phrasing. Skip the fancy transitions. A dense, clear, information-first presentation is what viewers value, and it is exactly what this workflow produces at scale.
Optimizing YouTube Metadata & Publishing for Maximum Reach
Metadata is where a repurposed video wins or loses its search fight. The post you converted already carries the keyword research, so the smart move is reusing that data instead of starting over. Most teams skip this, and it is the step that decides whether your video ranks.
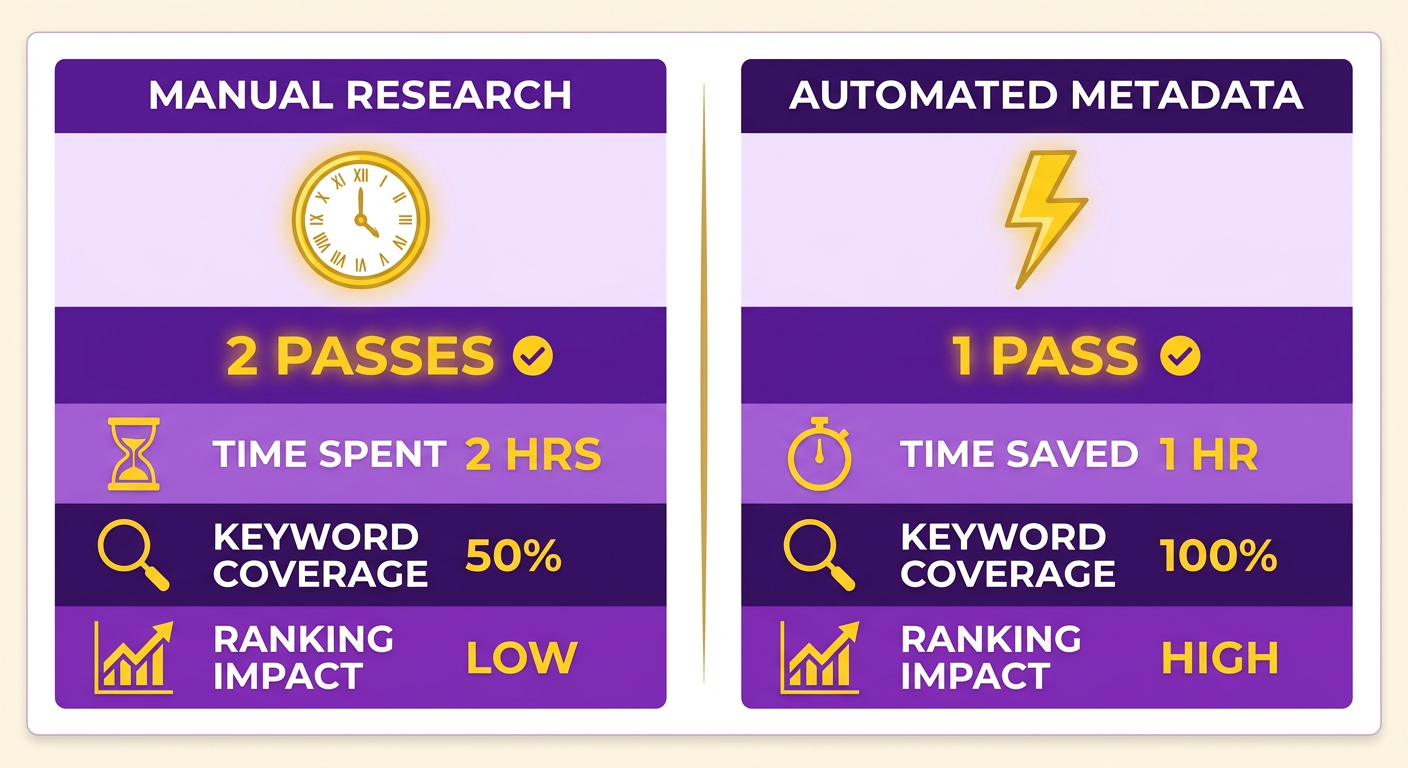
The pipeline that generated your script already knows your blog's primary keyword. Feed that same keyword into the title, description, and tags, and you skip a full round of manual research. Your repurposing workflow becomes one pass, not two separate SEO projects.
Writing a title that ranks and gets clicks
Best formula: your blog's primary keyword plus one power word, kept under 60 characters so it does not truncate in search. Accuracy beats hype. A title that overpromises tanks your watch time, and watch time is the metric YouTube actually rewards.
Pull the keyword straight from the blog's headline hook. If the post ranks, that phrase already matches search demand. Add a curiosity trigger like "fast," "proven," or "without" and you get click intent without tipping into clickbait.
Skip the all-caps and emoji-stuffed titles. They read as spam to viewers and the algorithm both, and they undercut the brand consistency your synthetic voice worked to build.
What goes in the description and tags
Mirror your blog's meta description in the first two lines, then add timestamps for each script beat. Timestamps create chapter markers, which improve navigation and give you extra keyword real estate. Include a link back to the original post for the backlink.
Mix three types of tags:
- Short-tail tags: the broad primary keyword for reach.
- Long-tail tags: the specific phrases your blog already ranks for, straight from your keyword data.
- Competitor tags: terms pulling traffic to similar videos in your niche.
Keyword research tools surface these tag opportunities and show search volume. Reuse the long-tail phrases your post targets. You already validated them.
What makes a thumbnail and schedule work
Thumbnail spec: 1280×720 pixels, bold text under six words, your brand colour palette on every frame. Consistency trains viewers to recognize your channel in a crowded feed. The text should complete the title's promise, not repeat it.
Schedule based on when your audience is actually online, not a generic "best time to post" chart. Audience insights tell you the time zone and the daypart where your subscribers watch. Publish there.
Then close the loop. Embed the finished video back into the original post. That boosts dwell time on the page, signals freshness to search engines, and often lifts the post's own ranking. One asset feeds two channels.
Embed a repurposed video and cross-promote it, and the embed plus the social distribution fire together to compound one asset's reach, instead of leaving the video to work alone. The publishing step is where the whole repurposing system pays off.
Automating the Entire One‑Pass Workflow with AnyPost.ai
The full one-pass pipeline runs from blog post to published video with zero manual handoffs. Wire together every step and you can let the system run on a schedule. The setups that work best connect these stages without asking you to intervene at every step.
When script, avatar, voiceover, and upload all trigger from a single source, the operational overhead vanishes. Beyond the editing time you save, removing manual handoffs between disparate tools lets your content engine run continuously without constant babysitting.
Building the blog-to-publish pipeline
Map five stages in order: Blog → Script → Avatar → Video → Publish. Each stage passes its output to the next as an input field, so no file gets exported and re-uploaded by hand. Set the trigger to fire when a post crosses your ranking threshold.
The Persona Engine sits ahead of script generation. It auto-tunes the tone to match your brand voice, so the narration sounds like you rather than a generic template. Configure it once and every video after inherits that same brand register.
During avatar generation, the system maps your script fields straight into the video rendering module. No manual copy-pasting between tools, and no sync issues between the voice track and the visuals.
What to monitor once it's live
Watch three numbers: views, watch-time, and lead conversions. Views tell you the metadata is pulling search traffic. Watch-time tells you the compression worked and people stayed. Conversions tell you the format is doing business, not just racking up impressions.
This is where the compounding shows up. A single high-performing post can spawn several video assets over a year with no additional writing. The real return sits in the ratio of published assets to hours worked. When one input yields multiple automated outputs, the efficiency gains stack.
Scheduling closes the loop. The Multi-Platform Publishing module queues uploads to YouTube on your calendar, so a Tuesday-morning post can be a Thursday-afternoon video without anyone hitting publish.
Is automation actually worth it over manual?
Yes, once you're past a handful of videos a month. Manual conversion means exporting scripts, uploading to a voice tool, syncing an avatar, then writing metadata and scheduling. Every step is a place work stalls. The pipeline removes all of them.
Treating each post as raw material and doing the assembly for you, the pipeline turns your website and social channels into an automated marketing engine. That kind of volume is impossible to hit by hand without a production team, which is the point of an automated content engine that keeps driving traffic, visibility, and leads.
One honest carve-out: skip full automation if you publish fewer than five videos a month. The setup time will not pay back at that volume. Do it manually until throughput justifies the wiring.
Adding Shorts and LinkedIn snippets
Once the pipeline exists, new output formats are cheap. The same script and voice feed a vertical TikTok short or a LinkedIn video snippet with a different crop and length. You're not rebuilding. You're reusing one source across channels, which is the whole point of a repurposing system done right.
These features let you automatically turn your core video assets into text posts and visual carousels tailored for LinkedIn, X, Instagram, TikTok, and YouTube, managing the whole multi-channel presence from one dashboard.
Common Pitfalls & Best‑Practice Checklist for Faceless Videos
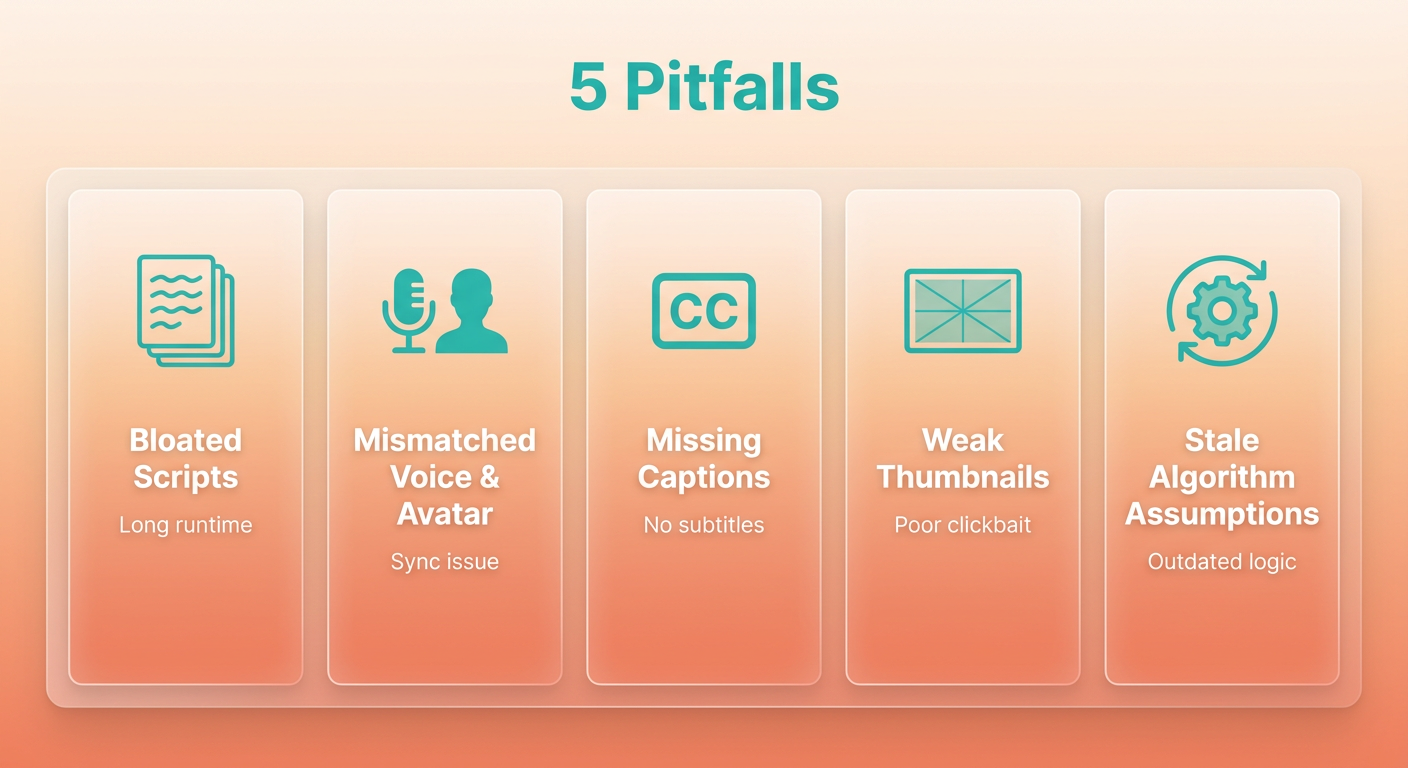
Most faceless video failures trace back to five repeat offenders that wreck otherwise solid repurposing pipelines: bloated scripts, mismatched voice and avatar, missing captions, weak thumbnails, and stale algorithm assumptions. Fix these five and your automated output goes from "publishable" to "watchable."
Automation streamlines production, but it cannot replace editorial judgment. The QA gate stays your job. Running every video through a standard pre-publish checklist keeps the output engaging and on-brand instead of merely technically complete.
The five pitfalls that kill faceless videos
Over-long scripts: a major watch-time killer. A genuinely deep guide supports a longer video, but force a thin topic into an extended monologue and viewers drop off fast. Keep most informational videos concise and let the depth of the original research set the runtime.
Avatar-voice mismatch: a crisp visual paired with a monotone or off-brand voice reads as fake instantly. The synthetic voice has to match your written tone. This is where a persona or tone-matching engine earns its place, aligning the voiceover to the same brand voice your blog already uses.
Missing captions: no captions means lower SEO and lower reach. YouTube indexes caption text, and a chunk of your audience watches muted. Enable auto-captions, then review them by hand. Auto-caption accuracy drops on jargon and product names, which is exactly the vocabulary your niche cares about.
Poor thumbnails: a weak thumbnail sinks click-through no matter how good the video is. Follow the 3-color rule to keep it readable at small sizes. Include a human element even in a faceless video. A face, hands, or an expressive graphic gives the eye something to lock onto in a crowded feed.
Ignoring algorithm updates: YouTube keeps shifting how it weights watch-time signals. What ranked last quarter may not this quarter. Stay current, and treat your metadata and length choices as things you revisit, not set-and-forget.
What your pre-publish checklist should cover
Run every video through six checks, in order, before it goes live. This is the two-axis QA gate most marketing guides skip: is it factually true to the source, and is it actually watchable?
- Script quality: does it stay true to the blog post's claims, with no invented facts?
- Voice sync: does the voiceover match the avatar and your brand tone?
- B-roll relevance: do the visuals map to the script beats, not random stock filler?
- Caption accuracy: have you reviewed auto-captions for jargon errors?
- Metadata SEO: is your blog's primary keyword in the title, description, and tags?
- Thumbnail test: is the layout clean, legible at small sizes, and aligned with your brand palette?
When to skip the "good enough" bar
Skip the throughput mindset when you're publishing authority content. Volume-monetized formats can run on "good enough" narration and still earn. But when a video carries your expertise claim, the fidelity bar goes up. Verify the facts hold and the delivery is watchable before it ships. That two-axis check is the difference between a channel that scales and one that just posts.
Frequently Asked Questions
1. How long should my source blog post be to produce a good video?
Your source post should contain enough substantive points to support your target video length without requiring filler. Rather than focusing on a strict word count, evaluate whether the post has distinct, actionable subheadings that can easily transition into individual visual scenes.
2. What happens if I ask the AI for a longer script than my post supports?
If you demand a lengthy script from a brief article, the generator will introduce repetitive phrasing and generic explanations to meet the target duration. This dilution reduces viewer engagement. It is far better to produce a short, high-impact video that matches the actual depth of your source material.
3. Can automation fix a poorly structured blog post?
No. If the original article lacks a clear narrative arc or logical progression, the automated script will feel disjointed when spoken. Successful conversion requires a strong foundational structure, meaning you should select posts that already use a clear, step-by-step explanatory flow.
4. Should I use the exact same SEO keywords in my script as in the blog post?
You should preserve your primary search terms, but prioritize natural phrasing over exact-match keyword placement. Spoken dialogue needs to flow comfortably for the listener, while your video's metadata, description, and closed captions handle the heavy lifting for search algorithms.
5. Is a hyper-realistic avatar better than a simple one?
Not necessarily. The key to success in faceless video is visual predictability and brand alignment rather than perfect realism. Choose a style that matches your industry's expectations such as professional models for corporate topics or stylized graphics for creative niches and stick with it across your entire channel.
6. At what point does automating the full pipeline actually pay off?
An integrated, automated pipeline is highly beneficial when you are scaling your content output to a consistent weekly schedule. If you are only producing occasional videos, handling the steps individually is manageable. Once you increase production frequency, connecting the tools directly saves significant administrative time.
7. Do faceless authority videos need the same quality bar as volume content?
Yes, because videos representing a professional brand directly impact your market credibility. While high-volume, ad-supported channels can sometimes prioritize speed over perfect polish, any asset tied to your business must undergo strict quality checks to ensure accuracy and professional delivery.
Ready to turn your blog archive into a faceless video engine? Start with your top-ranking post and run it through the script prompt above. The pipeline handles the rest.